
Nagios XI Monitoring Configuration--Understanding And Using Configuration Wizards In Nagios XI
This document is intended for use by Nagios Administrators that wish to get a thorough understanding of how Configuration Wizards work in Nagios XI.
Overview
Wizards are addons to Nagios XI that make it easy for end-users to monitor new devices, services, and applications with Nagios XI. Wizards provide a user-friendly interface to what otherwise might be a complex task. They are especially useful for users who are new to Nagios XI, they create all the related monitoring configurations without needing to understand how Nagios XI works in the back-end.
The topics covered in this documentation are:
Wizards can be accessed by going to Configure > Configuration Wizards. This guide will use the NRPE wizard to help explain how wizards work.
Common Steps In Wizards
In the following screenshot you can see how the search field allows you to quickly find a wizard.

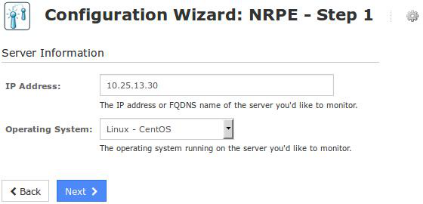
The options presented in Step 1 will be relative to the type of configuration wizard being run.
In this example you will be asked to supply the address of the machine running the NRPE client and you will also have to select the Operating System.
Click Next to progress to step 2.
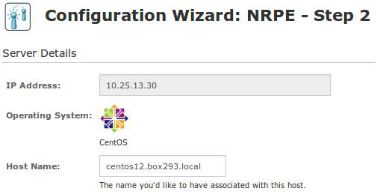
The options presented in Step 2 will be relative to the type of configuration wizard being run.
You will almost always be required to provide a Host Name. This name will be defined in the host_name directive of the host object that is created by the wizard.
Take a note that under NRPE Commands, the Current Users option is checked.
After making all of your required selections click the Next button to proceed to Step 3.

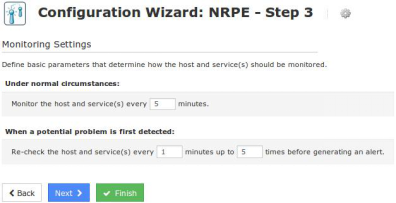
Step 3 provides the options for how often the device will be monitored (normally and when a problem is detected).
These options will be defined in the
check_interval, retry_interval and
max_check_attempts directives of the host and service objects that are created by the wizard.
After making all of your required selections click the Next button to proceed to Step 4.
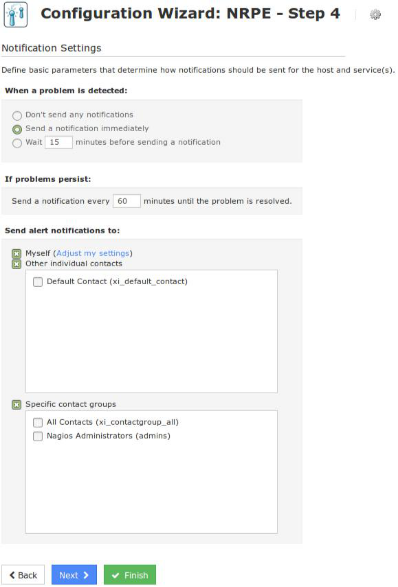
Step 4 provides the notification options for when a problem is detected.
These options will be defined in the first_notification_delay,
notification_interval, contacts and
contact_groups directives of the host and
service objects that are created by the wizard.
After making all of your required selections click the Next button to proceed to Step 5.
Step 5 provides the group and parent options.
These options will be defined in the hostgroups, hostgroup_name, servicegroups and parents directives of the host and service objects that are created by the wizard.
After making all of your required selections click the Next button to proceed to the Final Step.

On the Final Step you can click Apply to finish the wizard, this will create the monitoring objects.
The Save as Template button will be explained in the Wizard Templates section of this document.
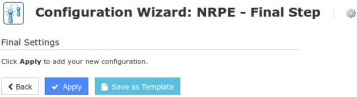
You will notice that from step 3 - 5 there is a Finish button. If you are happy with the default options of the wizard you can click Finish and the wizard will create the monitoring configurations, exactly as if you had clicked the Apply button on the final step.
How The Wizard Creates Objects
Based on the steps provided in the NRPE wizard that was run in the last section, when applied it will create:
If you navigate to Core Configuration Manager (CCM) you will find these objects and be able to update options as required.
In steps 3-5 the options chosen will be applied to both the host and service objects. With options such as contacts and contact_groups, because they are applied on both the host and services, any object inheritance is ignored. Object inheritance is an advanced feature of Nagios Core that allows directives such as contacts and contact_groups to be inherited by the services which can help reduce configuration complexity. However as as soon as a service object has the contacts or contact_groups directives defined, any inheritance from the host is ignored.
While on the topic of contacts, it is a recommended best practice to put your users in contact groups and use those groups for notification preferences. The reasoning behind this is that it is easier to change the group membership as apposed to having to update every object when adding or removing a contact.
Running A Wizard For An Already Monitored Server
If you have previously run the monitoring wizard against a server, you can run the monitoring wizard again at a later date to add more services to be monitored. Keep in mind that if you chose to monitor a service that already exists then it will not be overwritten. For example, in the NRPE wizard earlier the Current Users service was selected. When the wizard creates the objects, it will check to see if a service already exists and if it does then it will not attempt to create the service again.
More importantly is the name of the host object you provide on Step 2 of the wizard. Looking at the screenshot to the right you can see the wizard has auto populated centos12.box293.local in the Host Name field. This name can be changed to something like CENTOS12 for example.
When you are running a wizard to add services to an existing host, the Host Name field MUST match the name of the existing host object and it is CaSe sEnSiTiVe. If you had originally called the host CENTOS12 then you would need to re-type this the same. If you don't, then a new host object will be created and your new services will not be linked to your existing host objects.
Wizard Templates
Wizards Templates allow you to define the Step 3 - 5 options so you can use them whenever running a wizard. This ensures you always apply the same options every time you run a wizard.
Note: Do not confuse wizard templates with the templates that are available in CCM, these are completely separate.
To create a wizard template, after you have stepped through a configuration wizard, on the final step click the Save as Template button.
You will be presented with a pop-up window where you can give it a title and description. You can also make it a global template by checking the box. Global templates are templates that all users can use (normally templates are available for the user who created them).
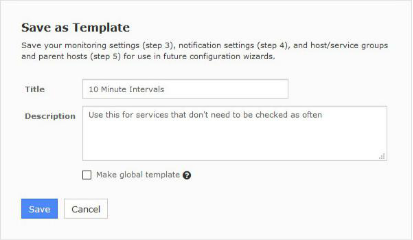
Click the Save button and once the template has been saved you will be returned to the final step of the wizard.
To use a template, on any step during the wizard click the gear icon to the right of the wizard title. This will provide a drop down list of wizard templates you can select to be used when running this instance of the wizard.
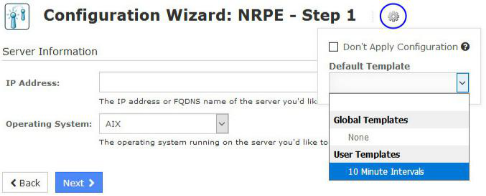
Click the gear icon again to hide the drop down list.
To manage wizard templates navigate to Configure > Configuration Tools > Manage Templates.

You can use the icons in the action column to edit or delete individual templates. If you wish to delete multiple templates you can select multiple check boxes in the left column and use the With selected drop down list underneath to perform the bulk action.
Editing a template allows you to update any of the options in steps 3 - 5.
Don't Apply Configuration
On any step during the wizard click the gear icon to the right of the wizard title.
The check box Don't Apply Configuration provides the ability to create new monitoring configurations without the Apply Configuration step being performed in the back-end.

This allows you to run the wizard multiple times and at a later time you can go into CCM and perform an Apply Configuration. This can be useful if you have specific time windows in which you only want new configurations to be applied.

© Copyright 2000-2025 COGITO SOFTWARE CO.,LTD. All rights reserved
