dotCover 2018.1: Better continuous testing and more!
In this 2018.1 release, dotCover is by far the product that has received the most changes in the whole .NET tools lineup. These include:
? Continuous testing with new modes available in any unit test session,
? Coverage analysis improvements including a new Unit Test Coverage window, real-time filters, and others,
? Console runner support to analyze coverage of web applications, and more.
We’ll leave the latter for a separate post, and focus on updated continuous testing and coverage analysis improvements.
Continuous testing. Now in any session!
So, what exactly has changed in continuous testing? First of all, there are no more separate continuous testing sessions. This is a big game changer: now, any session can be switched to the continuous testing mode.
This leads to some really positive consequences throughout:
? To start using continuous testing, you no longer need to re-run all tests under coverage in a separate continuous testing session. This was a significant limitation that prevented many users from trying continuous testing.
? In dotCover 2017.3 and earlier, your continuous testing scope was limited by a single continuous testing session. Now, you can have as many scopes for continuous testing as you need.
What the new workflow looks like:
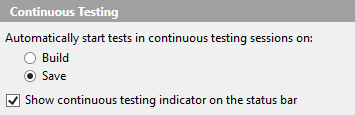
1. First of all, decide when you need dotCover to rerun tests: either after you save the solution, or after you build it (the default option). Select the preferred option in ReSharper | Options… | dotCover | Continuous Testing
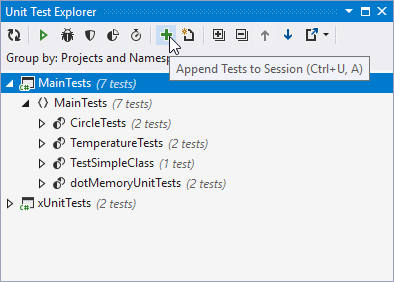
2. Create a new unit testing session, or open one that has the scope you want to cover by continuous testing. If you don’t have any sessions yet, you can use the Unit Test Explorerwindow to create one.
3. In the opened Unit Test Sessions window, select a continuous testing mode for your session. For example, if you want dotCover to autorun tests and get coverage each time you save or build the solution, select Autostart Tests on Build: Cover New and Outdated Tests.

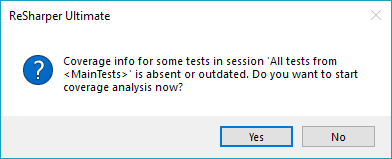
4. If you don’t have any coverage data or it is outdated for tests in the scope, dotCover will ask you to perform initial coverage analysis.
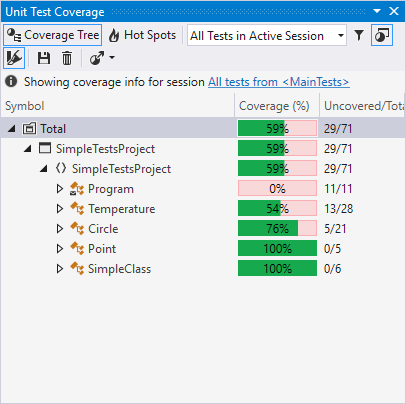
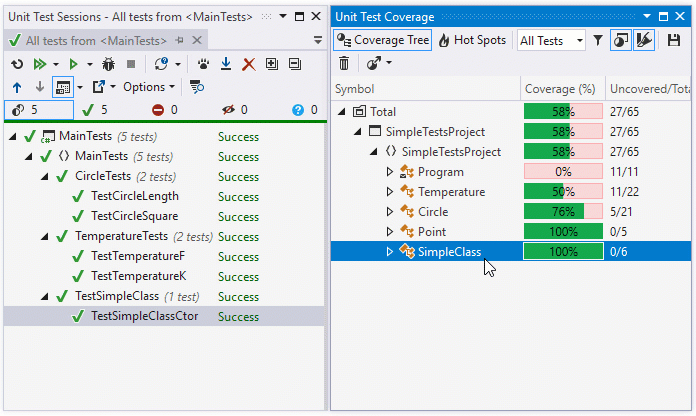
5. Coverage results will be shown in a separate Unit Test Coverage window (this is completely new – see the details below in this post).
6. That’s it! Now, simply start working as usual: change code, build or save (as needed), and see test results in real time.
New continuous testing modes
The next big thing in continuous testing is additional continuous testing modes. In dotCover 2017.3, you had no alternatives on how tests were auto-started during continuous testing. After you build or save your solution, dotCover started tests under coverage.
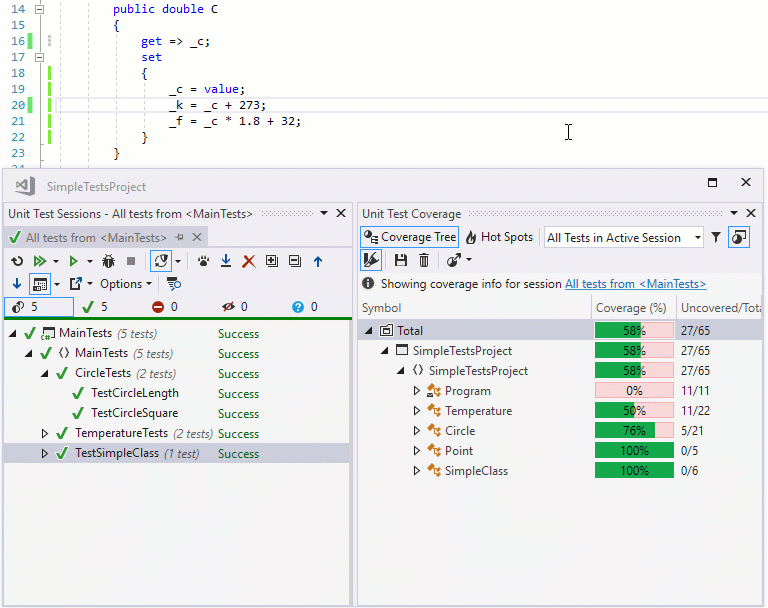
In 2018.1, coverage is no longer necessary: you can tell dotCover to simply run new and outdated tests (without covering them). This could be a great time saver if you already have an up-to-date coverage snapshot:
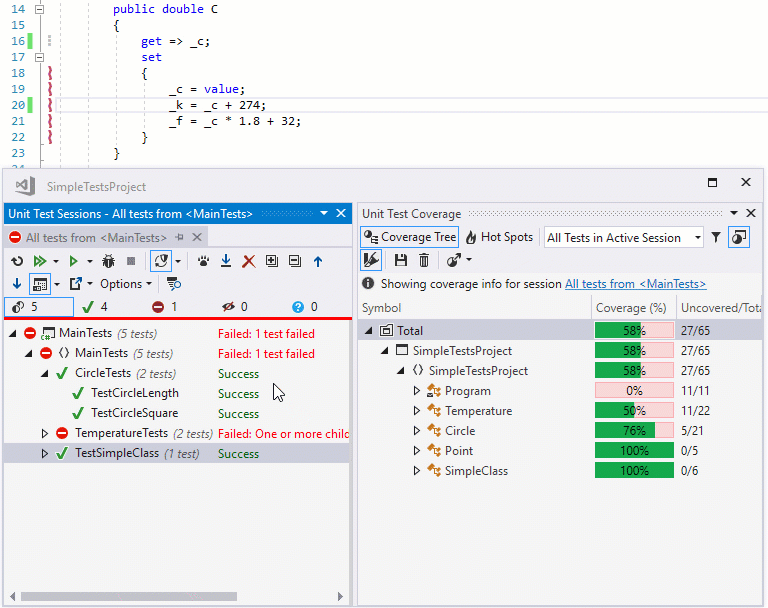
Note that in this case, coverage results use pale highlighting to emphasize that they’re based on possibly outdated coverage information. Nevertheless, if you are sure that the information is still relevant, you may keep working and postpone coverage until it really becomes outdated.
Aggregated coverage results
In dotCover 2017.3 and earlier, coverage results were shown per-session in the Coverage tab of a unit testing session. Now, the results are shown in a separate Unit Test Coverage window. Some pros of this approach include:
? The All Tests mode that aggregates coverage results from all sessions. It’s very cool, when, for example, you have some integration tests where continuous testing is not possible, and some simple unit tests where continuous testing is enabled. The window aggregates results from both sessions, allowing you to instantly see how close you are to covering all the code.
? Simple to use: as a separate window, it can be easily moved, adjusted, docked, and so on.
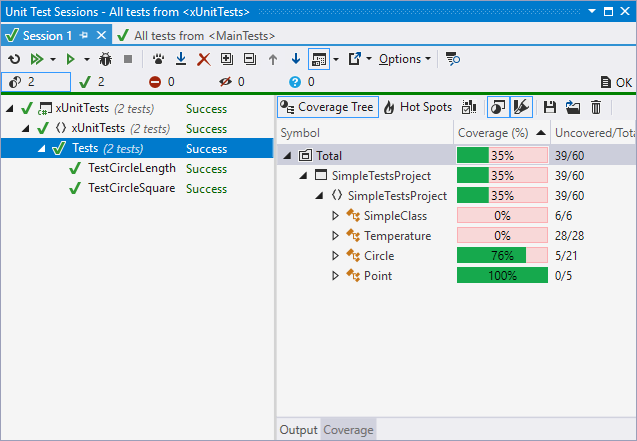
Previously: Results were shown only for the current session (note there’s one more session opened):
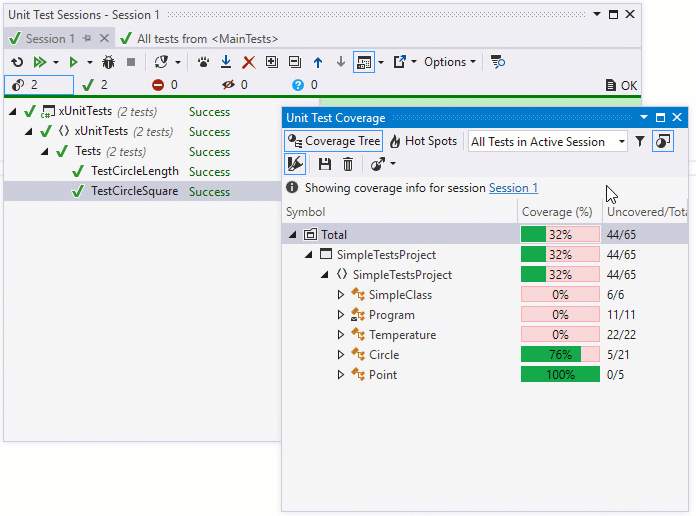
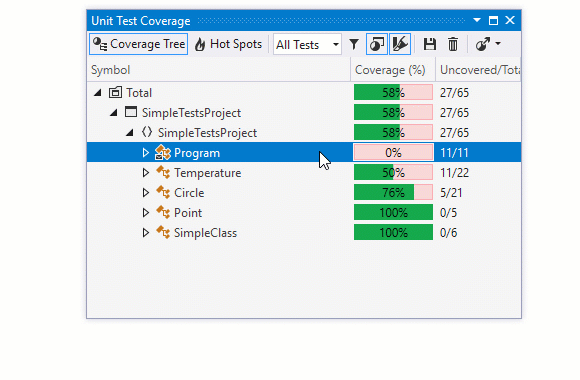
Now:
Dynamic coverage data
The new Unit Test Coverage window has one more advantage over its predecessor. In 2017.3 and earlier, coverage info was static: to update it you had to explicitly restart tests. Now, the update is performed dynamically.
First, removing a test from the current session deletes the related coverage data from the coverage tree.
If you add a test to the session, the Unit Test Coverage window will explicitly tell you that coverage data for some tests are outdated and will suggest running coverage analysis for this test.

Second, coverage filters are also applied instantly: if you apply a filter, the corresponding coverage data is removed from the tree. If you remove a filter, the Unit Test Coverage window explicitly tells you that coverage data is outdated.
To try these upgraded continuous testing and other improvements, download and install the latest product.

© Copyright 2000-2025 COGITO SOFTWARE CO.,LTD. All rights reserved
