Deploy Reboot Restore Rx Pro In a System Image
Reboot Restore Rx Pro can also be included in a system image and rolled out with the operating system deployment, such as one created with Norton Ghost or a similar utility. However, due to Reboot Restore Rx Pro’ security design, some of the program’s features do not exist in a visible file format. Instead they exist as bits and bytes on the physical sectors of the hard drive. Therefore the typical Ghost approach of imaging all files on the hard drive to create a system image will not be able to include all Reboot Restore Rx Pro components. Please follow these guidelines to prepare a hard disk for imaging including Reboot Restore Rx Pro:
1. Copy Reboot Restore Rx Pro program files from the installer package into a folder on the hard disk that you will use to create the system image (master image). Rename the folder as Setup.
2. Create an Advanced Setup Configuration File (SETUP.INI) with the SETUP.INI Wizard utility provided in the Deployment Tools folder of the installer package. Place the SETUP.INI file into the setup folder created in Step 1.
3. Open the SETUP.INI file in Notepad, scroll down to [Advanced.Partition], delete the lines underneath it and write in “ProtectDrives=systemonly” to have the SETUP.INI file protect the C: drive, or enter “ProtectDrives=all” to cover all drives. This is important, as when the INI file is created it will read the drive it was created on, including specific information related to that drive. By editing in either of these lines it ensures deployment onto any other drive will be successful.
4. Place the SetAutoSetup.exe utility, provided in the Deployment Tools folder of the installer package, into the Setup folder and double click to run it. SetAutoSetup.exe will write some deployment settings into the system registry.
5. Now the hard disk is ready for imaging. Image the drive with a Windows based imaging application or reboot the PC to a CD to create an image of this hard disk containing Reboot Restore Rx Pro setup files. DO NOT reboot into Windows after running SetAutoSetup.exe which had created some registry entries to automatically start the Reboot Restore Rx Pro deployment process, rebooting into Windows will kick off the Reboot Restore Rx Pro auto-setup process.
The master image contains the Reboot Restore Rx Pro deployment package rather than the already-installed Reboot Restore Rx Pro program. Once the master image is dumped onto a hard disk, at the first startup, SetAutoSetup.exe generated registry entries will trigger the Reboot Restore Rx Pro deployment process. This process is silent and transparent to the users. Setup reads in the program parameters from the SETUP.INI file configured in the previous step without any user interaction. At the end of the setup, SetAutoSetup.exe will automatically remove the Reboot Restore Rx Pro setup files and restart the system.
MSI Deployment
Download the utility for creating the MSI package by clicking this link: http://www.horizondatasys.com/downloads/Tools/appdeploy-repackager.msi
Before you start using the AppDeploy utility, first create an INI file. You can do so by using the wizard from the download package in the root folder -> Deployment Tools -> SetupINIWizard
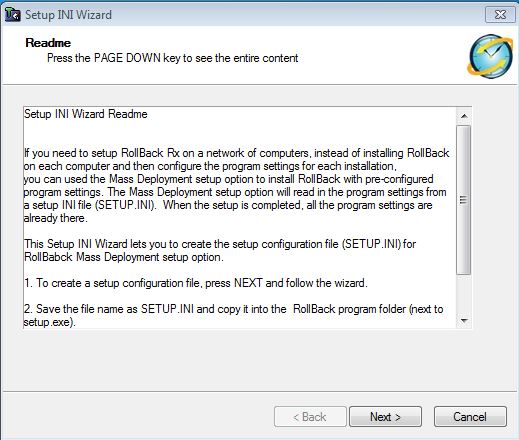
Once you set all the configurations that you want, click Finish and save it to the root folder and replace the existing SETUP.INI file.
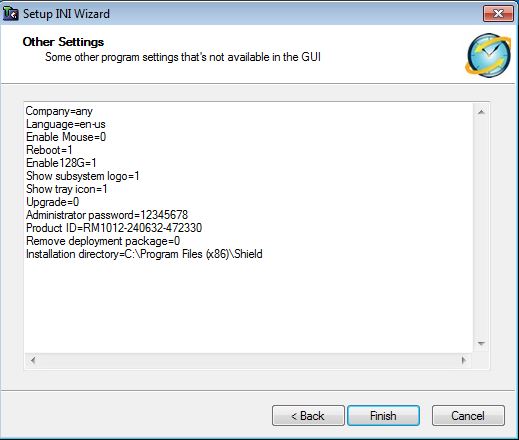
Open the SETUP.INI file in Notepad, scroll down to [Advanced.Partition], delete the lines underneath it and write in “ProtectDrives=systemonly” to have the SETUP.INI file protect the C: drive, or enter “ProtectDrives=all” to cover all drives. This is important, as when the INI file is created it will read the drive it was created on, including specific information related to that drive. By editing in either of these lines it ensures deployment onto any other drive will be successful.
Give the new SETUP.INI a test on your machine to ensure everything is working correctly. You can do so by navigating back to the root folder and running “Setup.exe”. As shown in the screenshot below, choose the “Unattended setup” option that will automatically trigger the “SETUP.INI” you created.
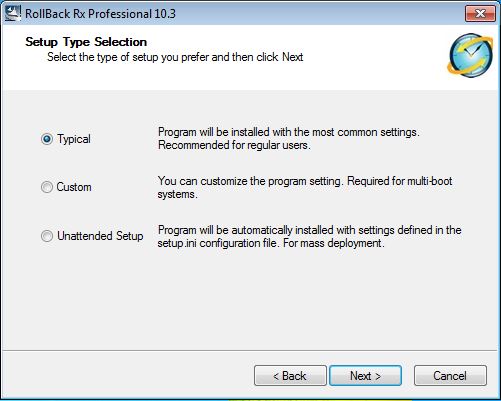
If everything worked correctly, you can move on and start creating the MSI package installer. To do so, follow these steps:
1. Go into Windows Explorer -> C: Drive -> create a folder called “Setup”
2. Open AppDeploy and select “Create an MSI setup based on system changes”. From the setup file location, choose “Setup.exe” from the root folder and the rest will fill in automatically.
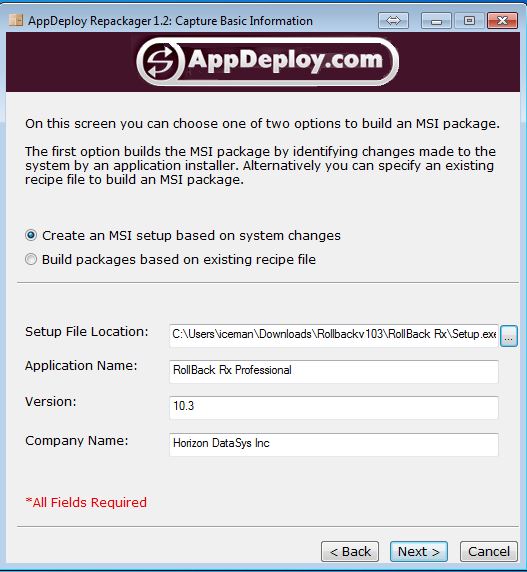
3. Make sure you have the above screenshot settings.
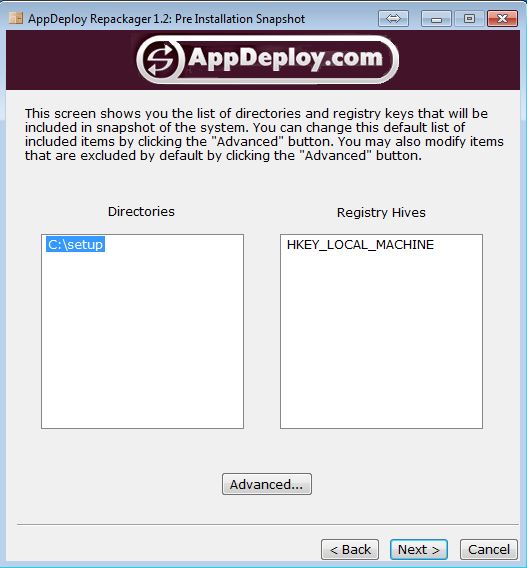
4. Click on "NEXT" and it will being the first initial scan
5. After the scan has completed, select "Do not launch Setup.exe"
6. Before you proceed any further, please copy all the files listed below to C:\Setup folder
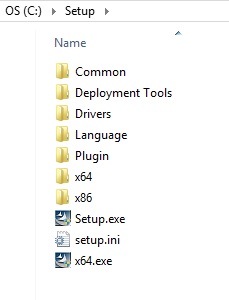
7. Go into the "Setup" folder now -> Deployment Tools -> and select SetAutoSetup.exe and move and/or copy this file to the root Setup folder. From this new location, run SetAutoSetup.exe
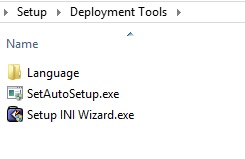
8. Go back to AppDeploy to trigger the second scan
9. Click "NEXT" two times, and it will prompt this Window
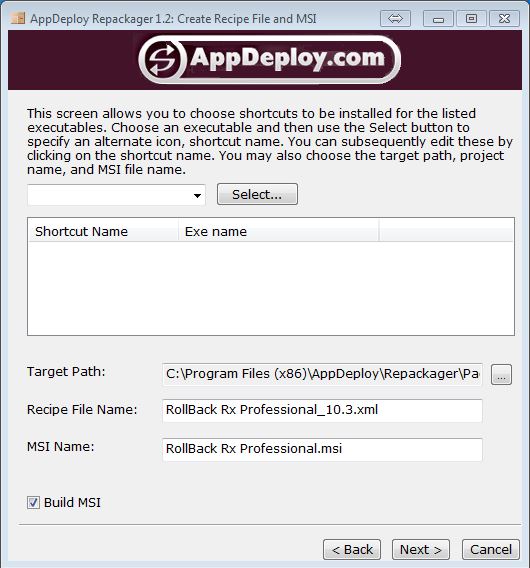
10. Click "Select" and uncheck "Program Menu" -> Click OK
11. Click on "Next", and then it will start packaging your MSI installer!
© Copyright 2000-2025 COGITO SOFTWARE CO.,LTD. All rights reserved