In Revu eXtreme, you can create Interactive Stamps customized for your projects’ needs. Stamps are made using JavaScript and can include buttons, form fields, company logos, dates, and more. Once they’re in a document, you and your colleagues can interact with stamps by filling out form fields, checking boxes, and modifying other content relevant to your project.
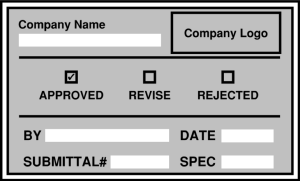
Interactive Stamps allow you to create forms that can then be edited and filled out by anyone. For example, when a user places the Submittal_Status stamp, they are prompted in Revu to:
While all editions of Revu can edit the appearance of an Interactive Stamp, Revu eXtreme is required to add form fields, edit form fields, and edit the JavaScript of an Interactive Stamp.
There are two ways you can make an interactive stamp. One way is to create the stamp from scratch using JavaScript. The other is to start with a pre-made stamp template (such as from our Revu Custom Libraries page) and customize it for your project. This article will focus on creating stamps with templates.
There will be three PDFs in the folder.
The next time you select the Stamp tool, this Stamp will appear in the list.


The content in the stamp can’t be changed after it has been added to a page.
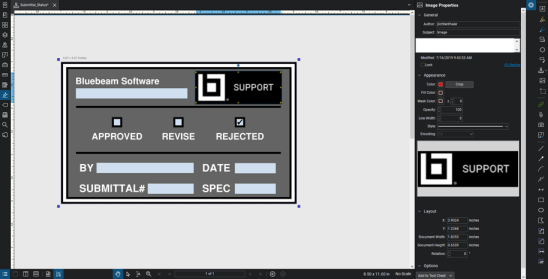
With the exception of the text inside Form Fields, you can customize any aspect of a stamp’s appearance in any edition of Revu. In this example, we’re going to customize the Company Name and Company Logo.
To make changes to a stamp, open it in Editing Mode:
If you need to adjust, add, or remove form fields, you will need Revu eXtreme.
This section focuses on how to make changes to the JavaScript dialog and form fields with little-to-no knowledge of JavaScript. Once an interactive stamp is placed on a document:
The JavaScript in the stamps from our Extensions page is split into two parts: the StampCode and the Calculation Script. These two terms are important to understand before editing your stamp.
The calculation script is pre-written and should not be changed. It can be found in the Properties of the “Calculation” form field. The calculation script defines the variables that are referenced in the StampCode. Without an advanced understanding of JavaScript, editing the calculation script will likely cause your stamp to fail. Do not edit or remove the “Calculation” field in the stamp.
Each stamp provided from the Extensions page works with pre-defined form fields. If you need to add more radio groups or other form field types, those aren’t supported. If you need to, you can contact Technical Support for more stamp examples.
Every stamp has a stored value called the StampCode.This is the back-end code that represents the visual elements in an interactive stamp. For example, if you want to add any form fields or edit existing ones, that has to be done though the StampCode. The StampCode controls what content is displayed in the stamp dialog and interacts directly with the form fields in the stamp.
Here’s an example of how the StampCode correlates to the form field names:

For all of the stamps in available on the Revu Custom Libraries Page, the StampCode is separated into two sections: the first half of the StampCode references all the text fields being used in the stamp, while the second half references a group of radio buttons and a dropdown list.
You may notice that the values in the StampCode currently reflect the names of each form field used in the stamp. For example, in the Forms panel, the radio button “Revise” is referenced in the stamp code as:
{ value:"Revise", description:"Revise" }
The text field called “CheckedBy” is referenced in the StampCode as:
{ field:"CheckedBy", description:"Checked by:", default:function() { return Collab.user; } }
In both of these examples, the StampCode starts with value: or with field:. Those two terms correlate directly to the names in the form field. If a form field name doesn’t exactly match its StampCode value or field, the JavaScript will fail to execute. For example, if we changed the radio button “Revise” to “Revised” but didn’t update the StampCode to match that term, then the Stamp would fail.
After value or field is the description, which is what will display after placing the stamp and encountering the JavaScript dialog. For example, the form field “Spec” is referenced as:
{ field:"Spec", description:"Spec #:", default:function() { return ""; } }
To customize the field descriptions that are displayed in the JavaScript dialog, edit the name of the form field in the Forms panel and in the StampCode. The description does not need to match the name of a form field. For example, if we change “Spec #” in the StampCode to “Specification Number,” the dialog will reflect that change.
To add a new radio button to an existing radio group


The new section of code looks like this:
{ value:"Approved", description:"Approved" },
{ value:"Revise", description:"Revise" },
{ value:"Rejected", description:"Rejected" },
{ value:"Support", description:"Supported" }
When you add the Stamp to a PDF, the Stamp dialog should display the new option created. In this instance, the dialog now shows a fourth radiobutton called Support.

The stamp has been successfully modified!
If you add a new radio button using the Form tools directly, a second radio group will be created and won’t be a part of the same radio group that already exists. You can change the name of the new radio button in Properties (Alt + P) to change the name to “Status”, which will add the button into the Status radioGroup.
The Submittal Status stamp is only intended to operate with one radioGroup. If you attempt to add a second radioGroup, the stamp will no longer function properly.
In summary, the Interactive Stamp process occurs in this order:
In multiple stamps that are provided from the Extensions page, you may notice that a Text field is used as a Dropdown List or a List Box form field. Using an actual List Box or Dropdown List field type will be incompatible with any of the Calculation Scripts embedded in Bluebeam’s stamps.
Here is an example of a text field that displays as a Dropdown List in the Stamp Dialog:

The text field “Project” acts as a Dropdown List in the Stamp Dialog. The list of items that will appear in the Stamp Dialog are dependent on the StampCode.

The most common issue that occurs with interactive stamps is that the Calculation field was deleted. If the Calculation field is deleted, the JavaScript Dialog won’t appear when the stamp is placed.

To recreate the Calculation field after deletion, you’ll first need to find and copy the Calculation field of the original template
Then add the Calculation field into the broken stamp:


If you encounter any issues with the steps in this article or have questions about our Interactive Stamps, send an email to us.

© Copyright 2000-2025 COGITO SOFTWARE CO.,LTD. All rights reserved
