How to install IDA floating licenses on a Windows server
To be able to use the IDA floating licenses, you need to first configure a license management server, FlexNet license manager in our case. The workstations that will run IDA will need to be able to connect to this server to check out a license. We will show you how to configure the server part first, and then the client on the workstations. The licenses are locked to your particular server based on the MAC address of the first network card. You cannot edit this ID later because it will invalidate the key. You can activate the licenses only once, so please choose your server carefully.
Briefly, the steps on the server are:
Install lmadmin on the server (or you could use the command line edition)
Copy the hexrays.exe vendor file to the same folder where lmadmin is installed
Start the lmadmin service
Launch your web browser with URL localhost:8090 to access the management GUI
Change the login password (default is user: admin / password: admin)
Obtain an activation file from our portal
Import your license file into the license management server
The steps on the workstation are:
Install IDA with the installation password
Run IDA and enter the license management server’s name or address
Please make sure the ports IDA uses to access the management server are open in your firewall both on the workstation and the server. Read this guide to see what they are and how to change them.
Here is a more detailed step by step guide:
1. Install the lmadmin on your server. You can find the latest lmadmin at the support page:
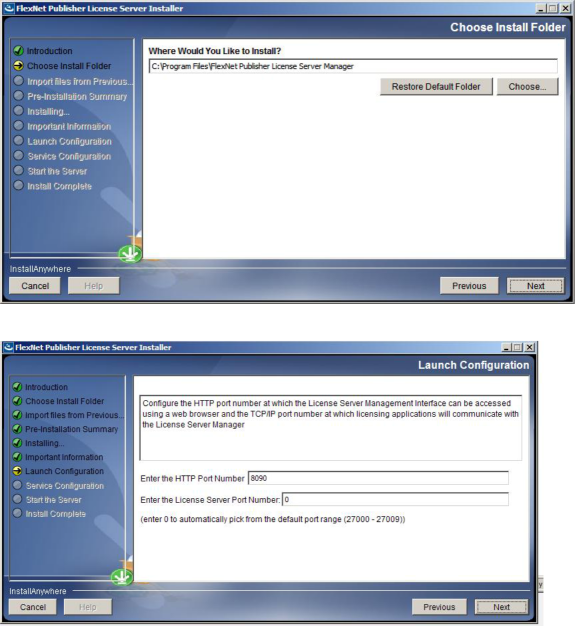

We recommend that you install it as a service so it can run in the background.
Make sure the service has actually started. If not, go into Computer Management in Windows and start it. Otherwise, the license manager web interface will not work.

You will obtain the .lic file shortly from our activation portal.
Alternatively, you can run the lmtools utility. You can download it from the support page above and put it in the same folder where the FlexNet manager is installed. We will show you how to install the licenses using the browser-based admin interface.
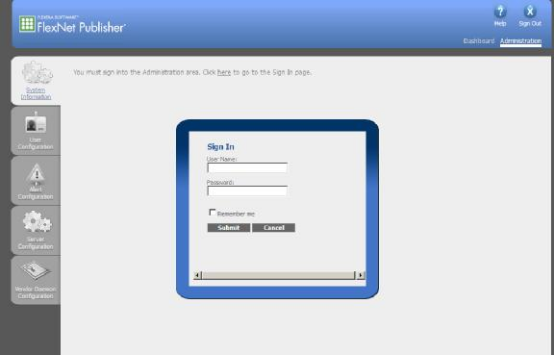
4. Click on the Administration link on the top right side. You will need to sign in. The default username and password are admin / admin. You will be asked to change the password the first time you login.


You will need the ida.key file, the MAC address of the first network card in the server where the license manager will reside, and the email address you had provided us when you got your IDA license. The portal will send this information to our activation system.
 |
You can obtain the MAC address (Ethernet Address) from the System Information tab of the
license manager web GUI. You should copy and paste this value into the activation portal.
 |
You can also get it by running ipconfig –all from the command prompt in Windows; it is called the Physical Address. If there are multiple network cards, you want the first card’s address. It is better to get this information from the license manager System Information so that it matches what it expects. This number will be hard-coded in the license file our system generates. This locks the licenses to that server. You cannot edit this ID later because it will invalidate the key. You can activate the licenses only once.

Our system will email you a .lic file as an attachment. You need to save this attachment in a file on your server. You will import it into the management server later.
 |
6. Click on the Vendor Daemon Configuration tab on the left side. You will see a link that says Import License. Click on that link.
 |

Import your activation file by browsing for the file you had saved from your email and then click on Import License button. After it is imported, it will be installed in the licenses\hexrays folder under the C:\Program Files\FlexNet Publisher License Server Manager folder by default.
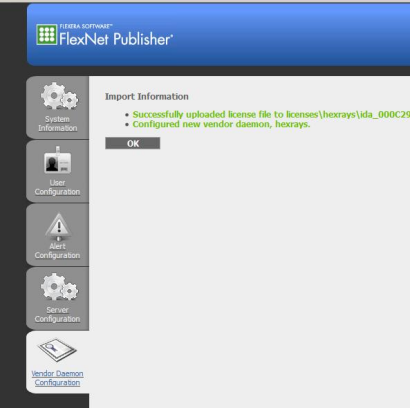

You should have three additional folders: logs, cache and licenses. Inside the licenses folder, there will be
another folder called hexrays and your .lic file should be in there.
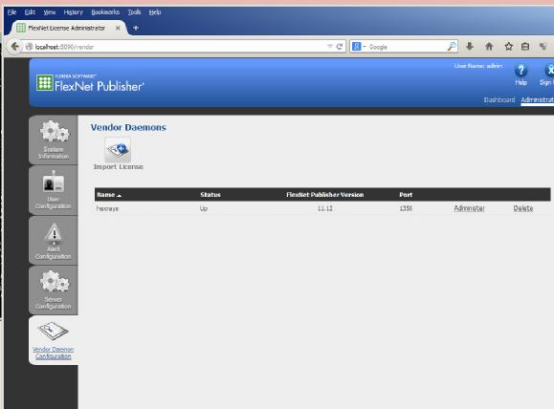
The daemon will pick a port automatically. If you double click on hexrays in the list, you can see what it is using, 1112 in our case. This port needs to be open in your firewall for the clients to be able to check out a license.

Because this port changes every time the daemon starts, it is better to either allow the daemon executable (hexrays.exe) to listen on any port in your firewall, or if you wish to have tighter control over the ports, you can designate a specific port in the Vendor Daemon Port. If you do set a specific port, you will need to stop and restart the daemon so that the new port will be used.
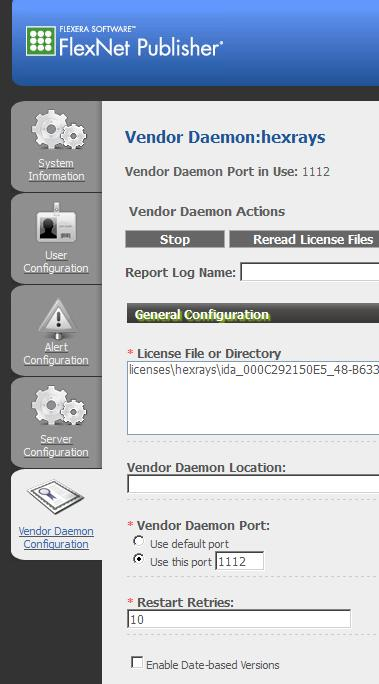
The port for the license server itself and the vendor daemon can also be changed in the .lic file:
SERVER this_host 000C292150E5 31000 VENDOR hexrays PORT=1112
If you change the port from the default, it needs to be specified in the connection dialog in the IDA client.
Now click on the Dashboard link at the top right, and then click on Concurrent button. You should see your licenses listed.

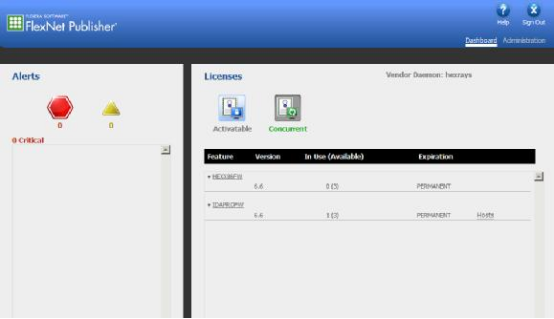
You can see the number of licenses checked out in the dashboard. 0 (3) in our example shows that we have 3 available and 0 checked out.

Click next to enter the name or the IP address of the server.
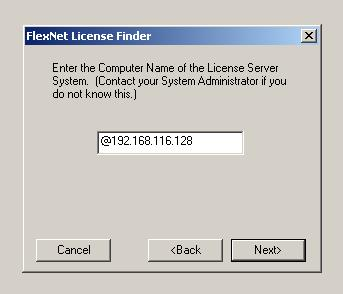
Click next and IDA will attempt to connect to the server over the default TCP port, which is 27000 and our vendor daemon port 1112. If it works, you will get a dialog telling you that it has completed.

If it fails because you have a firewall blocking the port on the client, you will get something like this:
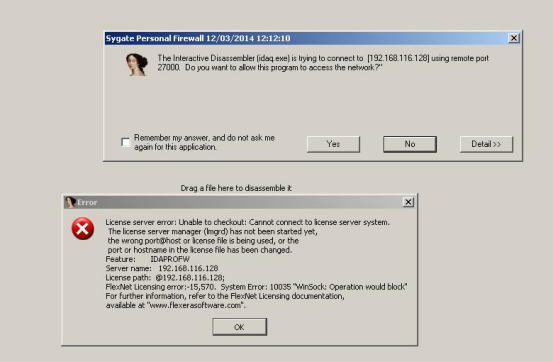
We had the firewall running and it blocked the port. As a result, IDA displayed an error dialog. If the firewall is open on the client, but it is blocked at the server, then the error message will be:
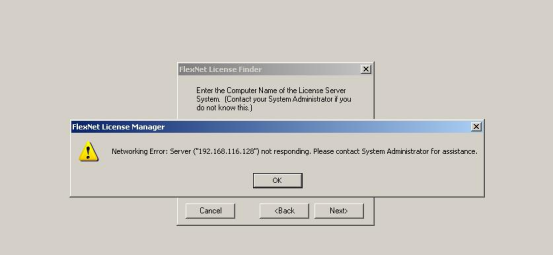
As you can see on the server, our firewall has blocked the incoming connection:
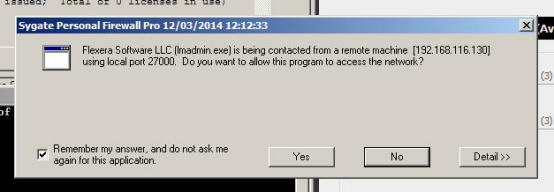
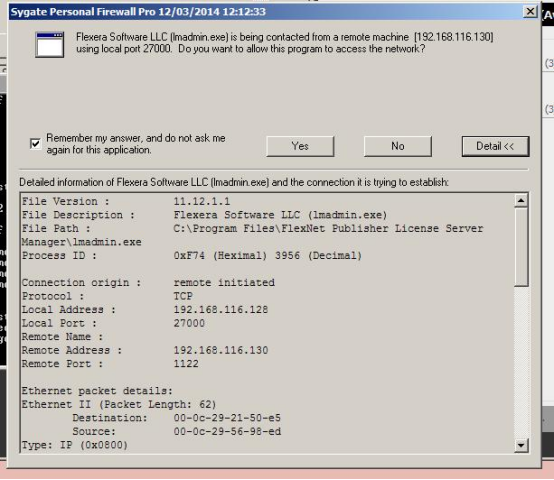
Our firewall shows us more details like this:
Assuming you sorted out the firewall issues and IDA was able to obtain a license, you will see that it checked out one license. Look at the server management dashboard and Concurrent screen; refresh it to see the latest status of the licenses:
If you click on the Hosts link, you will see the name of the client machine:

We can see that it is the same as the name of our client machine:

© Copyright 2000-2025 COGITO SOFTWARE CO.,LTD. All rights reserved