https://support-thepixelfarm.co.uk/documentation/docs/pfclean_workflow_manager.html
The Workflow Manager is the organisational hub of PFClean. Using a node graph, it controls and illustrates the flow of clips from import in the Media Manager through Media Bins to exporting the final result in the File Out nodes. This overview serves both as convenient way of visualising large projects and a means of selecting and managing media in a project.
The Workflow Manager is the initial view when creating a new project. Whenever the Workflow Manager is not visible, such as when working on individual clips, you can press the Workflow Manager button in the top-middle of the GUI to access the Workflow Manager:

There is always at least one Media Bin and one File Out node, as well as the Media Manager present in any PFClean project.
The Workflow Manager is structured to represent the flow of clips from their external location through the Media Manager to Media Bins, and from there through one or more nodes into File Out nodes, where the final result will be written to disk.
Nodes types are organised in horizontal layers to indicate their connectivity. A node's output can only be connected to the input of a node in a layer further down.

The view onto the Workflow Manager is fixed and cannot be zoomed or panned.
New Media Bins can be created in the Media Manager, whereas all other nodes are created in the Workflow Manager. The other nodes can be created by clicking the + buttons on the left for the required node.
Nodes in the Workflow Manager are selected by clicking on them using the left mouse button. Multiple items can be selected by holding down the Ctrl key while selecting. By dragging with the left mouse button a rectangle can be drawn and all items within that area are selected.
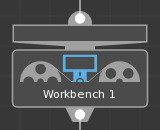
Selected items are shown with a white border:
Nodes may be moved horizontally, but not vertically, by dragging them with the left mouse button. If the node being moved is part of the group of nodes currently selected, then all selected nodes are moved. Holding down the Shift key while moving a node will also move any nodes connected to it downstream.
Note that the Media Manager can not be moved and is always displayed in the centre of the Workflow Manager. Media Bin and File Out nodes can be dragged to reorder the sequence in which they are display, but they are always placed in the centre of the Workflow Manager.
Nodes can be deleted from the Workflow Manager by right clicking the node to bring up a popup context menu for the selected node. Select Delete from the context menu to delete the node.
The Media Manager can not be deleted nor can non-empty Media Bins or the last remaining Media Bin or File Out node of project.
The flow of clips is represented by connections between nodes. Two nodes can be connected by dragging a line from a nodes output connector to another nodes input connector.
As the line is dragged its colour coded to show the validity of the potential connection. A red line indicates no connection is possible, a green line that a connection is possible.
Note: Clips flow in the Workflow Manager from Media Bins at the top towards File Out nodes at the bottom. Any nodes output can only be connected to a node located further down. Fixed horizontal layers for each node type represent possible connections. With the exception of the Remaster node, a node can only have a single input.
The number in the middle of the connection indicates how many clips are flowing through it.
A connection between two nodes can be broken by clicking on the link. The link will turn yellow with the words Del? displayed. Clicking the link again will confirm the disconnect action. Moving the mouse away from the connection will leave the connection intact.
Note: Rearranging node connections can have a fundamental effects on clips. For example, disconnecting a Media Bin node from a Workbench node will cause any cleanup work you performed in the Workbench to be removed from the clips, since those clips are now no longer flowing through the Workbench where the effects are conceptually applied.
Nodes can be renamed by double clicking the the node's name.
If a node can not be interacted with, say deleted or connected to, then this usually indicates that the node is in use by other parts of the application and so can not be modified.
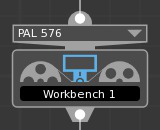
A quick way of seeing if a node is in-use is the fact that the black surround to the nodes name turns grey to indicate the node can not be renamed. Alternatively, press and hold the i key to show an overlay on each node that indicates what other part of the application is using the nodes preventing it from being modified.
|
|
|
|
|
A node not in use |
A node in use |
A node in use with overlay applied |
Digital Wet Gate, Workbench, Telerack and Standard share a common panel to organise media in the node and reuse settings.
Clips in a node can be grouped in different work lists. If no worklist is selected, all clips in the node are displayed.
Click New to create a new worklist. This will automatically open the node's Media Gallery. Clips can be added to the new worklist by dragging and dropping them into the list area.
Click Rename to rename the selected worklist.
A worklist can be deleted by selecting the worklist and clicking the trashcan button.
The Media button switches between the node's main view, and the Media gallery.
Note: The Media button is only active when a worklist is selected.
The current settings and parameters of a node (for example, the current effects stack in a Workbench) can be stored as a preset. Once stored, presets are available in all nodes of the same type in a project. Presets can be exported to disk and imported into other projects.
A preset can be renamed by double clicking on the its icon and typing the new name.
A selected preset can be exported to disk by clicking Export. A previously exported preset can be imported into the project by clicking Import.
A preset can be deleted by selecting it, and clicking the trashcan button.
How presets can be used in each node is described in the relevant node's chapter of this manual.
All clips in a PFClean project have a format standard applied to them. Clips can be directed in the Workflow Manager based on their standard format.
Digital Wet Gate, Workbench, Telerack and Standards nodes can control which standard formats can flow into them. The Select a standard menu on the top of the node will list all available standards flowing into the node. To restrict the node to a certain standard format, simply select the desired standard from the menu.
If more than one standard format is available when selecting a standard, a new output connector will be created at the upstream node, containing all remaining clips.
Note: Digital Wet Gate, Telerack and Standards node require a standard format to be selected before carrying out work in the node. If only clips of a suitable standard format are connected to the node, this standard format will be selected automatically.
What follows is a brief summary of each different node type. Each node type is described in full in their own section of this document.
The single Media Manager node:

represents all media in the project. Double click on it to open the Media Manager controls to allow clips to be imported, new media bins to be created, and all other media related operations.
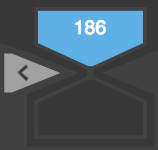
A Manual media bin node:
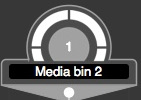
is shown for each manual media bin present in the project. A manual media bin is a bin containing clips which have been manually managed. The number in the middle of the node is the number of clips in the media bin. Double clicking on a media bin node opens up that media bin showing the clips it contains.
A Smart media bin node:
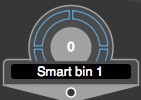
is shown for each smart media bin present in the project. A smart media bin is a bin containing clips which are automatically managed, for example defined by the contents of an EDL. The number in the middle of the node is the number of clips in the media bin. Double clicking on a media bin node opens up that media bin showing the clips it contains.
A Digital Wet Gate node:
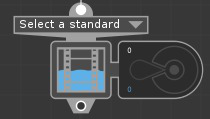
is shown for every Digtial Wet Gate present in the project. Double clicking on a Digtial Wet Gate node opens up that Digtial Wet Gate to be worked on. Digtial Wet Gates are where fast automatic cleanup of film based formats are are performed.
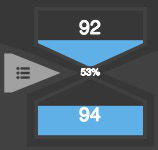
Each Digital Wet Gate node comes with an attached control:

which can be used to cache the results of the Digital Wet Gate operations onto disk.
The white number at the top left of the control illustrates the number of clips ready to be cached in the node. The blue number below illustrates the number of clips already cached in the node.
Click this button to start caching all clips in the attached node.
Please note that it is not a requirement that this node be disk-cached at all. The image data for an un-cached clip will be generated "on-the-fly" as required by PFClean. Only if the time to achieve this is prohibitive, for example preventing real-time playback during review, is it necessary to cache the clip to disk.
Note that if the node contains clips of multiple standards, caching will only be available if disk cache locations have been specified for all of those standards.
For further details of how to prepare disk cache locations, see the Managing cache locations section in the Project Manager chapter.
Note that this node can not be connected to a Telerack node.
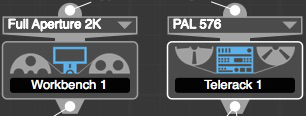
A Workbench node:

is shown for every Workbench present in the project. Double clicking on a Workbench node opens up that Workbench to be worked on. Workbenches are where manual and automatic restoration effects are applied.
When a clip is disconnected from a Workbench the effects on that clip are removed. However, this may be undesirables behaviour if, for example, the disconnection was accidental since it could result in lost work. A preference exists [JGC] to control whether the effects applied by the Workbench are owned by the Workbench itself (and so are deleted when the clip is disconnected from the Workbench for whatever reason) or owned by the clip and so are re-applied if the clip is re-attached to a Workbench.
A Telerack node:
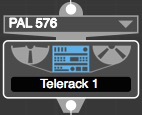
is shown for every Telerack present in the project. Double clicking on a Telerack node opens up that Telerack to be worked on. Teleracks are where fast automatic cleanup of tape based formats are performed.
Note that this node can not be connected to a Digital Wet Gate node.
A Remaster node:

is shown for each remaster sequence present in the project. Double clicking on a Remaster node opens up that remaster sequence.
A Standards node:
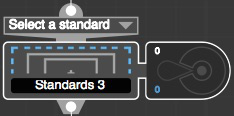
is shown for each Standards conversion node present in the project. Double clicking on the Standards item opens up that Standards conversion node.
Each Standards conversion node comes with an attached control:

which can be used to cache the results of the standards conversion operation onto disk.
The white number at the top left of the control illustrates the number of clips ready to be cached in the node. The blue number below illustrates the number of clips already cached in the node.
Click this button to start caching all clips in the attached node.
Please note that it is not a requirement that this node be disk-cached at all. The image data for an un-cached clip will be generated "on-the-fly" as required by PFClean. Only if the time to achieve this is prohibitive, for example preventing real-time playback during review, is it necessary to cache the clip to disk.
Note that if the node contains clips of multiple standards, caching will only be available if disk cache locations have been specified for all of those standards.
For further details of how to prepare disk cache locations, see the Managing cache locations section in the Project Manager chapter.
The File Out node:

exports clips from PFClean.
To run the export click on the export button next to the File Out's name on the right.
The export is performed via the batch processing system and once submitted its status is shown in the item:
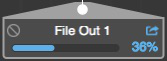
Clicking on the export button while it is highlighted blue selects the job in the batch panel for more control over the job, e.g. pausing and cancelling.
All File Out nodes in a project can be started by clicking the triangular render button in the main export panel that is shown at the bottom of the Workflow Manager when no nodes is selected:
The number in the top half of the export control illustrates the number of clips ready to be exported. The number in the bottom half shows the number of clips that have been exported.
Clicking on the 3-line list button highlights the job in the batch panel for more control, e.g. pausing and cancelling.
Individual File Out nodes can be excluded from this operation by clicking the disable button next to the File Out node's name on the left.
Click on the File Out item to specify export parameters such as path and file format.

© Copyright 2000-2026 COGITO SOFTWARE CO.,LTD. All rights reserved