
Nagios XI--Using The Core Config Manager For Host Management
This document describes how to manage hosts, host groups and host templates using the Nagios XI Core Config Manager (CCM). While monitoring wizards make it easy to set up new hosts in Nagios XI, the CCM allows for more precise control over host monitoring,
notifications, and configurations.
Core Config Manager Overview
Hosts can most easily be setup using the Monitoring Wizard under the main Configure page. However, some administrators may need more customized options, or a greater degree of control over their monitoring setup. The Nagios XI CCM allows for precise control over host monitoring, notifications, and configurations.
You can access the CCM from the Configure option on the top menu, and then select the Core Config Manager option under the Advanced Configuration option, or when you hover your mouse on the Configure option on the top menu it will appear as an option.
This document will discuss how to do the following items within CCM:
The Industry Standard In Infrastructure Monitoring
Adding Hosts
To manually add a new host, select the Hosts link located under Monitoring on the left menu of CCM. This will bring up the Host Management page, which displays a list of the current hosts being monitored by Nagios XI.
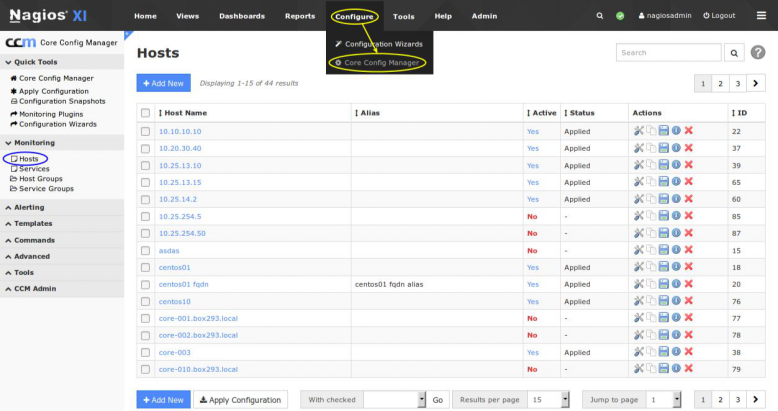
Click the Add New button to manually add a new host.
The Host Management page will open on the Common Settings tab.
This tab allows you to define the primary host parameters such as Host Name, Description, Address, and Display name.
All fields labeled with an asterisk are required fields.
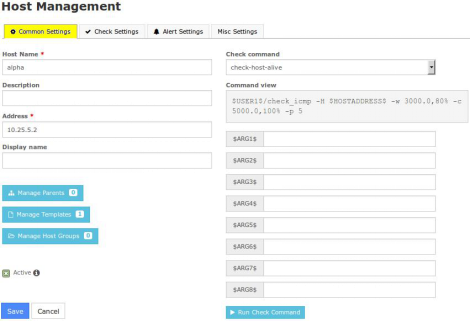
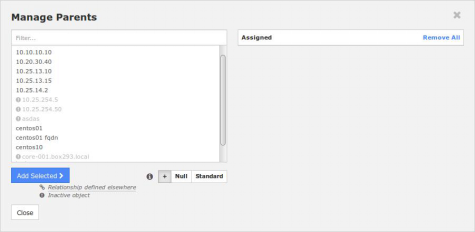
Use the Manage Parents button to associate parent host(s) for the host.
Parents are used to specify network configuration connections.
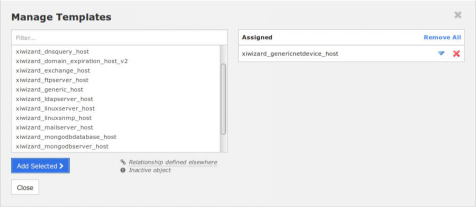
Use the Manage Templates button to associate template(s) to the host.
Templates provide a method to push the same host setting to similar hosts.
Use the Manage Host Groups button to associate existing host group(s) to the host.
Host groups are a way to group similar hosts together.
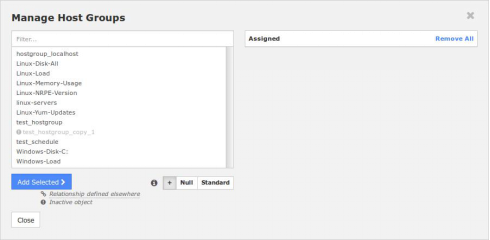
On the previous screenshot of the Common Settings tab you'll notice that the Active checkbox is checked. If this box is un-checked the host configuration won't be put into production when Apply Configuration is performed. However the settings will remain in CCM until you activate the host object.
To define the check command for this host, you select the appropriate command from the Check command drop down list . On the previous screenshot of the Common Settings tab you'll see that check-host-alive is selected. Every command in the Check command drop down list is associated with a set of Nagios Core commands and arguments, which are shown in the Command view field. In this example there are no additional parameters required for the $ARGx$ fields.
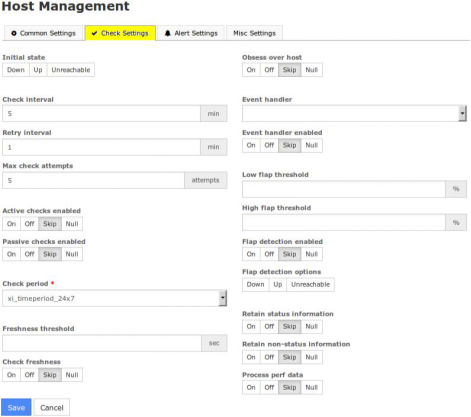
The Check Settings tab allows you to specify the settings for frequency of checks and also the host state.
If a problem is detected with a connection, you can specify the details of how the problem is handled.
You will notice a lot of options have Skip chosen. This means that the setting is not being directly defined on the host object, this prevents any settings defined in templates from being overwritten. If you look at the previous Manage Templates screenshot you'll see the template
xiwizard_genericnetdevice_host
is being used, which has these settings applied (as well as that template using another template).
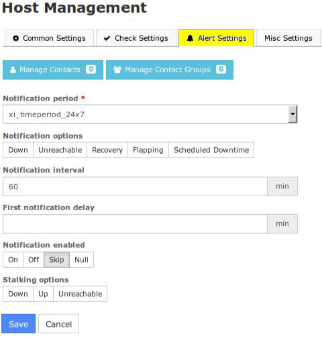
The Alert Settings tab allows you to specify your notification settings.
Use the Manage Contacts and Manage Contact Groups buttons to associate your existing contacts and contact groups with this host.
The Misc Settings tab is for defining additional host information and can be used for adding notes, icon images, and also for setting Free variable definitions.
There are a few important things that you should note about Free variables (custom object variables):

Once you've finished entering information for your new host, click the Save button to return to the Host Management page.
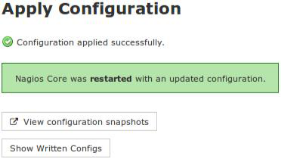
Click the Apply Configuration button to restart Nagios XI and put the new settings info effect. Nagios XI will verify the settings and display a success message that the host was set up correctly.
Modifying Hosts
Host can be modified by clicking the Modify iconOR the host name itself from the Host Management page.

This will bring up the same set of tabbed menus covered in the Adding Hosts section of this tutorial. Refer to that section for a detailed walk through of the tabs that control host settings.
Deleting / Deactivating Hosts
Host can be deleted by selecting the Delete icon from the Host Management page.

Multiple hosts can be also be deleted by selecting the desired hosts in the left checkbox column and then selecting Delete from the With checked drop down list.
Hosts can be activated or deactivated by clicking on the Yes or No link under the Active column. Deactivating a host is the same as deleting it as far as the monitoring engine is concerned, but this does preserve the host's configuration within Nagios XI if you want to recover it later. You can also deactivate multiple hosts using the With checked drop down list.
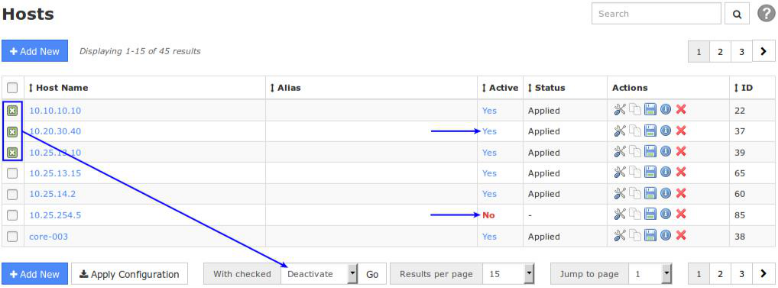
Important Note: Hosts can only be deleted/deactivated once their dependent services are also deleted/deactivated.
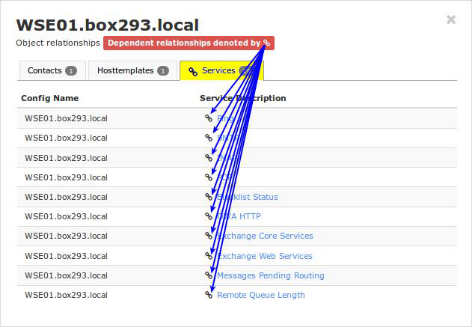
To see if a host has dependencies click the Information icon (i) to check for dependencies.
This information will be displayed in a pop-up window. In the screenshot to the right you can see this host has multiple services that prevent it from being deleted or de-activated.
To delete a host with dependencies, make sure all of the services assigned to this host are deleted first.
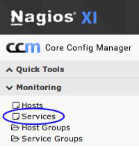
To remove dependent services, click the Services link to bring up the Service Management page.
Use the Config Name drop down list to bring up all services being used by the selected host.

Click the top-left Checkbox, this will select all the services in the list. From the With Checked drop down list select Delete and then click the Go button.
Once all dependent services have been deleted, return to the Host Management page and use the Delete icon to delete the host. If the host was deleted successfully,Nagios XI will display a success message at the top of the page.

If there are unresolved dependencies, Nagios XI will display an error message in red at the top of the page.

Once the host is deleted, be sure to click the Apply Configuration button for the monitoring of the host (and services) to stop.
Copying Hosts
Copying a host is a quick way to start monitoring a new host, especially if the new host will have similar (if not the same) monitoring settings.
To copy a host, click the Copy icon from the Host Management page for the host you want to copy.

If you wanted to copy multiple hosts, select the desired hosts you want to copy in the left checkbox column and then select Copy from the With checked drop down list.
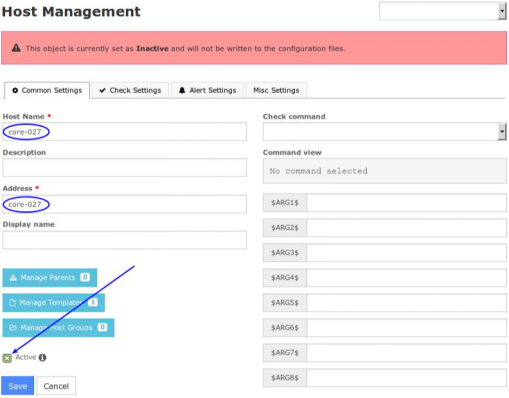
After a creating a copy, the duplicate host(s) will be assigned a default name that will need to be changed.
Host copies are also inactive by default, and will need to be activated for monitoring use.

To rename and activate the copied host click the Modify icon.
Change the entry for Host Name to a valid name.
You will also need to change the address to the address of the new host that will be monitored.
To activate the host copy, click the Active checkbox.
Once changes are complete click the Save button.
Click Apply Configuration to start monitoring the new host.
Managing Host Groups
Host Groups allow you to group hosts in a logical manner, making it easier for users to get a quick view of their network infrastructure. They will not have an impact on the notifications or access control, but will make it easier for both your users to grasp what they are looking at and for you as the administrator to quickly pinpoint where problems are occurring.
You can define new host groups by selecting the Host Groups menu item (under Monitoring) from the Core Config menu and clicking the + Add New button.

You will need to give the new Host group a name and description.
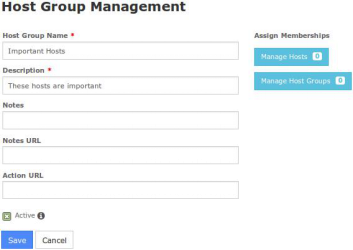
You can add hosts or host groups to the newly created host group using the
Manage Hosts button and Manage Host Groups buttons.
When you are finished click the Save button.
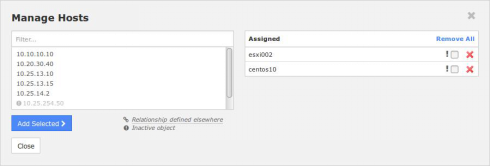
Remember to Apply Configuration when you are done making configuration changes.
Using Host Templates
Host templates can be created by selecting the Host Templates link from the Core Config menu Templates.
This will bring up the Host Template Management page.

Many administrators prefer to create their own host templates to specify default values for check commands, notification settings, and contact settings. Templates can also inherit values from other templates, which can be useful for creating universal settings for hosts and services.
From the Host Template Management page, you can add, modify, copy, or delete existing templates. Nagios XI comes with an existing selection of host templates that can be used or modified for your monitoring needs. The Host Template Management page uses the same layout and menu system as the Host Management page. See the above section on Adding Hosts for details on navigating the user interface.
Important Note: Templates can inherit values from other parent templates. If a template has a parent template assigned via the Manage Templates button, it will inherit that template's settings. Be careful when modifying the "generic" templates, as these are the main parent templates and this may affect many of the other templates that inherit values from it.

Bulk Modifications Tool
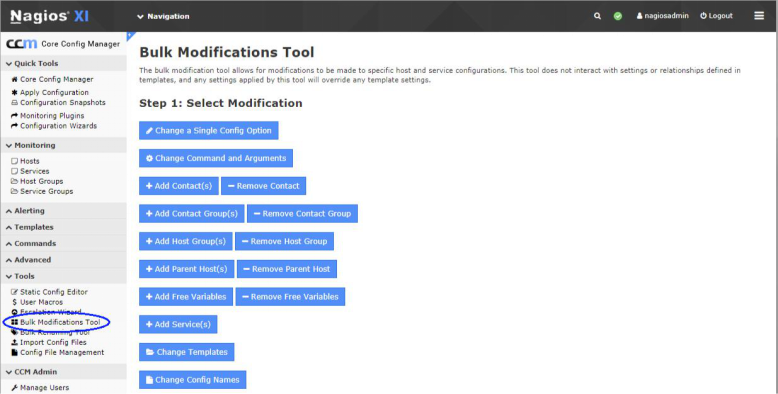
When you need to update a configuration setting for multiple hosts you can use the Bulk Modifications Tool, which is located under the Tools menu. This allows you to make a change like adding a contact to a selection of hosts, instead of manually editing each host.
The Bulk Modifications Tool is available when you have the Nagios XI Enterprise License. If you are not licensed for the Enterprise Edition you can enable a 60 day trial which allows you to use all the features of the Bulk Modifications Tool.
The screenshot on the following page shows the location and options of the Bulk Modifications Tool.
© Copyright 2000-2025 COGITO SOFTWARE CO.,LTD. All rights reserved